Linux Host
This section show how to install a new Android image to ROCK960 on board eMMC using the upgrade_tool on a Linux host computer.
- Step 1: Make sure upgrade_tool is set up on host computer
- Step 2: Download necessary Android images
- Step 3: Boot device into maskrom mode
- Step 4: Prepare the flash environment
- Step 5: Flash images onto ROCK960 eMMC and reboot
Step 1: Make sure upgrade_tool is set up on host computer
Linux
upgrade_tool is a closed source binary by Rockchip. It can be downloaded from rockchip-linux github. The current version is v1.33. Download it.
Since upgrade_tool released by Rockchp is a 32bit binary, most of us run 64bit Linux machine, we need to install 32bit libraries to run it.
On Ubuntu 64bit, install the following package:
sudo apt-get install libc6-i386
unzip the tar ball we downloaded
unzip Linux_Upgrade_Tool_v1.33.zip
cd Linux_Upgrade_Tool_v1.33
Use the configuration file
mkdir -p $HOME/.config/upgrade_tool/
cp config.ini $HOME/.config/upgrade_tool/
sudo cp rkdeveloptool /usr/local/bin/
Test if upgrade_tool working properly
sudo upgrade_tool -v
should return
Upgrade Tool v1.33
Step 2: Prepare necessary Android images
Go to the Downloads page to donwload the image or use your own built one. update.img is the default name if you follow the build instructions of AOSP. We use the name -rkupdate.img to refer Rockchip format packed Android image.
It contains the following partitions:
......
├── boot.img (Android rootfs)
├── kernel.img (Kernel image with Rockchip checksum)
├── MiniLoaderAll.bin (first stage bootloader)
├── misc.img (boot command, boot recovery, wipe data etc)
├── parameter.txt
├── recovery.img
├── resource.img (kernel dtb with other boot resource files such as logo image)
├── system.img
├── trust.img
└── uboot.img
Step 3: Boot device into maskrom mode
Maskrom mode is the code inside the Rockchip SoC running and waiting for commands from USB when there is no external bootable media. To put the device into maskrom mode:
For ROCK960
You need USB3.0 or USB2.0 type A to type C cable:
- power on rock960
- plug the rock960 to Linux desktop with USB type A to type C cable
- press and hold the maskrom key, then short press reset key
- release maskrom key(important!)
For ROCK960C
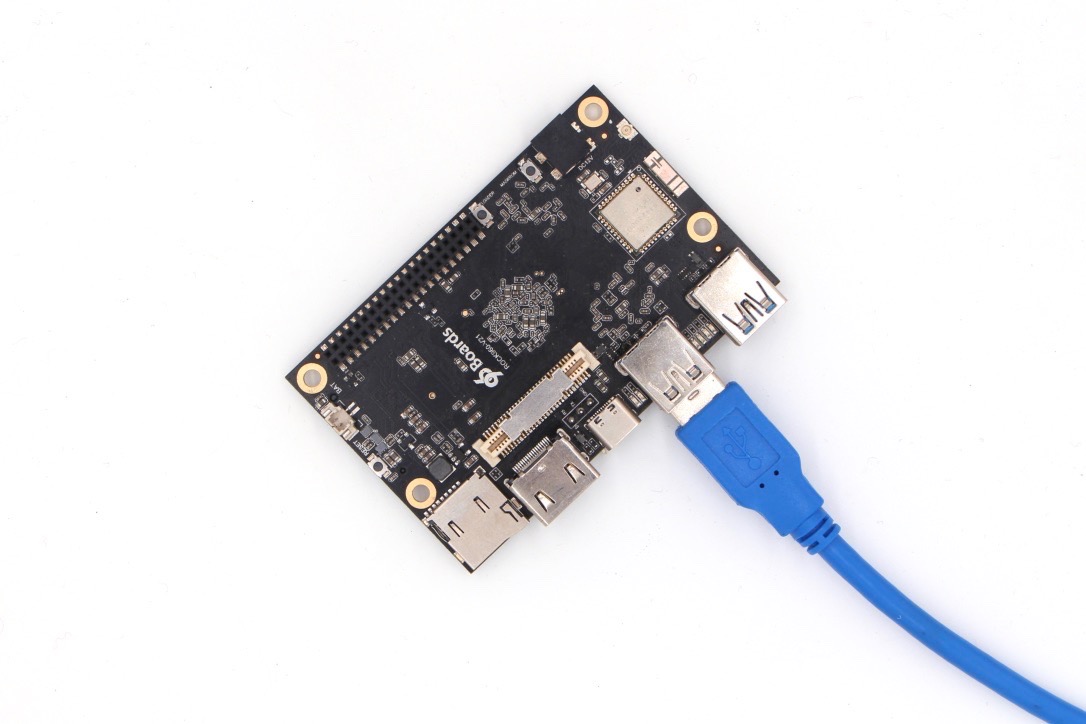
You need USB3.0 or USB2.0 type A to type A male cable:
- plug the eMMC module on rock960c and power on
- plug the rock960c to Linux desktop with USB type A to type A male cable from the USB 3.0 OTG port, as below:
- press and hold the maskrom key, then short press reset key
- release maskrom key(important!)
Note: You don’t need to switch the HOST/DEVICE switch for USB OTG, in maskrom mode, USB OTG is forced as device mode.
Alternatively, if you are running Android and can access ADB, you can reboot the device to loader mode adb reboot bootloader then use the upgrade_tool to reset the device into maskrom mode upgrade_tool rd 3.
After the device is in maskrom mode, on the host PC, lsusb should show the following VID/PID if the board is in maskrom mode: Bus 003 Device 061: ID 2207:0011
Note: if no right USB device found, try:
- Press and hold maskrom key longer, and short press and release reset key
- Check your usb cable, plug and unplug the usb cable, reverse plug the type C cable and try
- Try the direct USB port at the back of mother board
- Try with USB 2.0 cable, not 3.0
Step 5: Flash images onto ROCK960 eMMC and reboot
To flash the rkupdate.img to on board eMMC
sudo upgrade_tool uf /path/to/rkupdate.img
This will take a while, after it finishes, upgrade_tool will reboot the device.
Flash by partitions
Flash kernel only:
sudo upgrade_tool di -k kernel.img
Flash resource only:
sudo upgrade_tool di -re resource.img