Getting Started
Learn about your TB-96AIOT-1126CE board as well as how to prepare and set up for basic use
Setup - What you will need
Required
- TB-96AIOT-1126CE development board
- Power adapter
- 96Boards specification requires a 12V with 2500mA power adapter
Optional
- HDMI Display
- USB Keyboard and Mouse
Out of the Box
In the Box you can find the TB-96AIOT-1126CE as well as a microSD card which comes with a pre-installed linux.
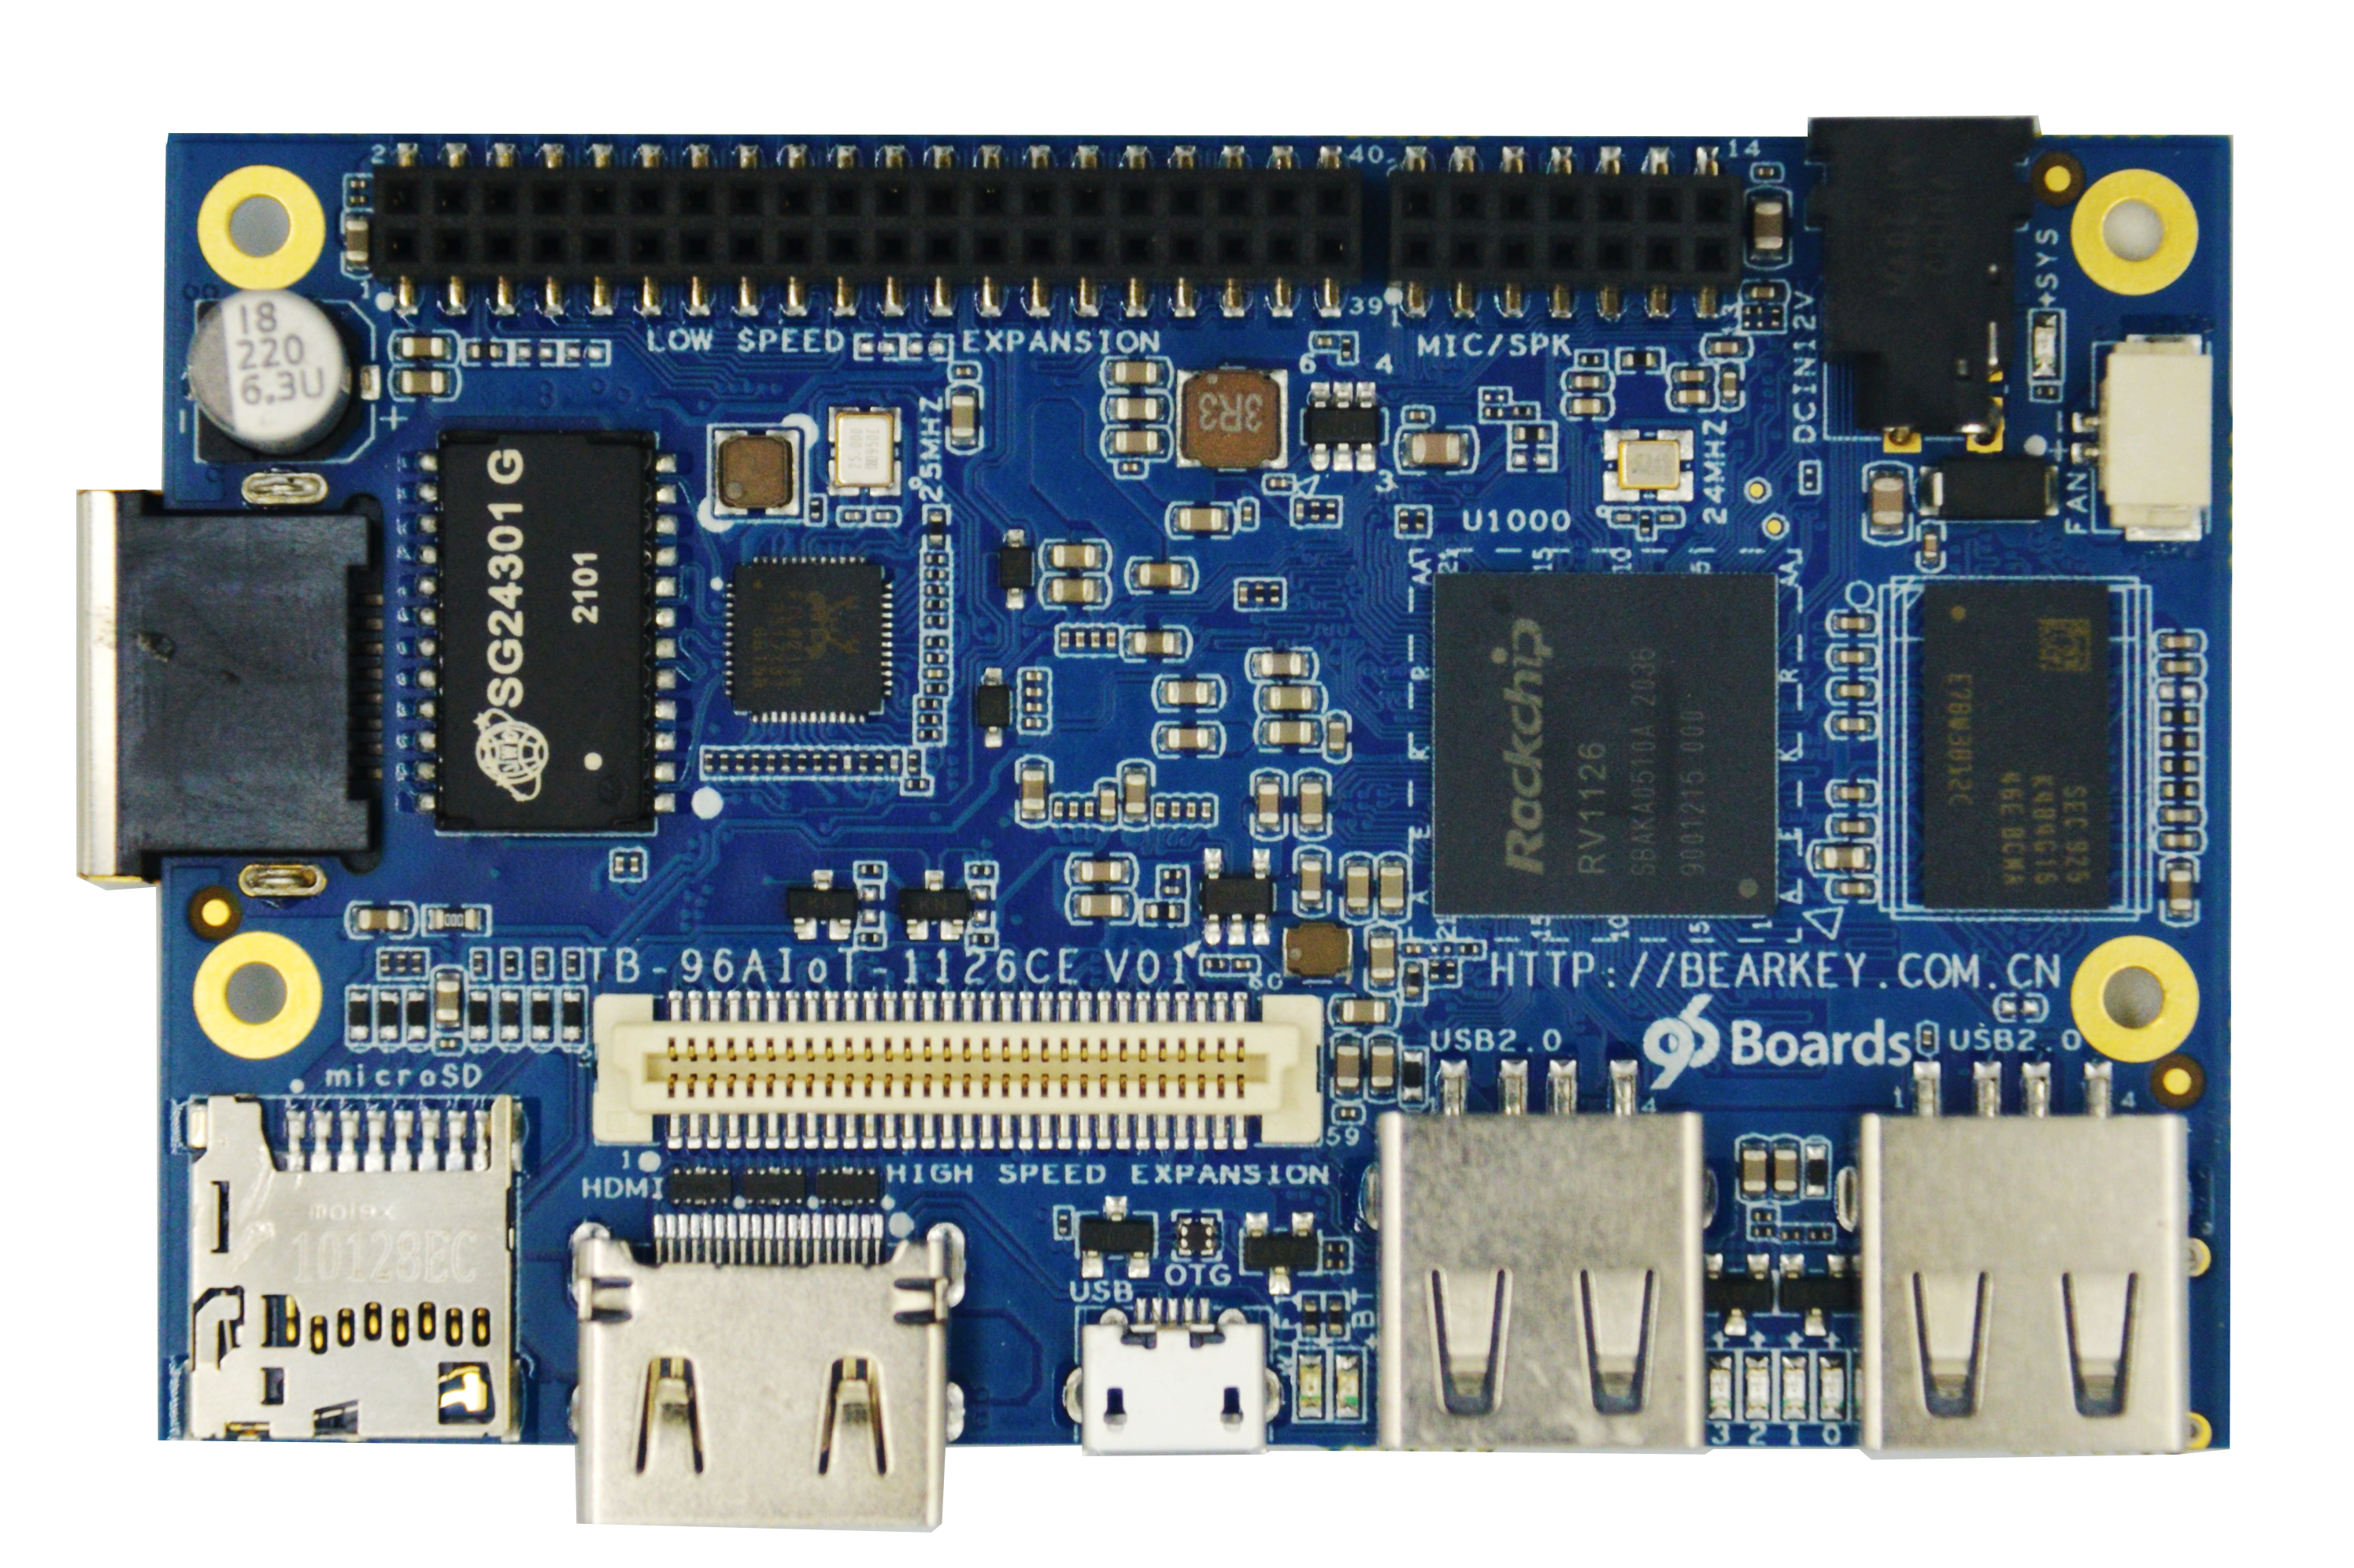

Features
| Component | Description |
|---|---|
| SoC | RV1126 |
| CPU | 4x ARM®Cortex-A7 up to 1.5 GHz 1x RISC-V MCU up to 400 MHz |
| GPU | 2D Graphics Acceleration Engine |
| RAM | 1024 Mbyte DDR3 |
| Storage | eMMC 16 Gbyte microSD Socket: UHS-1 v3.01 |
| Ethernet Port | 10/100/1000 Mbit/s, IEEE 802.3 Compliant |
| Wireless | WiFi: 5 GHz & 2.4GHz IEEE 802.11 a/b/g/n/ac Bluetooth® v5.0 External Antenna |
| USB | Host: 2x type A, 2.0 high-speed OTG: 1x type micro-AB, 2.0 high-speed |
| Display | HDMI 1.4 |
| Audio | Over HDMI |
| Expansion Interface | 96Boards Compliant: 40-Pin Low Speed Header 14-Pin Low Speed 2 Header 60-Pin High Speed Header |
| LED | 4x green user controlled LEDs 1x blue Bluetooth enabled 1x yellow WiFi enabled |
| Button | Power, Reset & Recovery |
| Power Source | DC Power Jack: 1.65mm Center Positive 8v - 18v upto 24W |
| OS Support | Linux: Debian & Buildroot |
| Size | 54mm x 85 mm |
Starting the board for the first time
This short guide leads you through the first steps to start exploring your TB-96AIOT-1126CE.
Easy Setup Guide
- USB cable to Dubug
- Connect the Micro-USB end of theUSB cable to the debug port andTypeA-USB to the computer host.
- Open the serial port tool of the host computer and apply the followingconfiguration:
- baud rate: 1500000
- Data bits: 8
- Stop Bit: 1
- Parity Check: NA
- flow control: NA
- Connect HDMI cable (optional)
- Connect one end of the HDMI cable tothe development board HDMI port andthe other end to a display that supports HDMI.
- Connect to Ethernet (optional)
- Plug wired Ethernet into RJ45 ports ofthe development board.
- Connect mouse and keyboard (optional)
- Insert a USB mouse and USB keyboard to the USB port of the development board.
- Mouse and keyboard to watch/track on HDMI display.
- Connect LTE module (optional)
- Insert LTE/5G module into M.2 port
- Insert SIM card at the same time
- Connect a USB-OTG cable (optional)
- When firmware needs to be re flashed, plug micro USB port of USB data cable into USB OTG port of development board, and typea USB at the other end to computer host
- Connect DC12V power cord (power on)
- Connect the 12V power plug, and when the power supply is connected, the development board starts automatically.
Whats Next?
If you are already familiar with the TB-96AIOT-1126CE and would like to change out the stock operating system, please proceed to one of the following pages:
- Downloads page: This page lists all Linaro and 3rd party operating systems available for the TB-96AIOT-1126CE
- Installation page: If you already have the images you need, this page has information on how to install the different operating systems onto your TB-96AIOT-1126CE
- Board Recovery
- If at any time your board is having unexplainable issues, it is suggested to attempt a board recovery. These instructions will guide you through a succesfull board recovery.
- Support
- From bug reports and current issues, to forum access and other useful resources, we want to help you find answers
Back to the TB-96AIOT-1126CE documentation home page