Linux host
This section shows how to flash IVY5661 with a Linux machine. There will be five steps.
Step 1: Prepare Necessary Software
Step 2: Set IVY5661 to ROM Code Mode
Step 3: Connect IVY5661 with Host Machine
Step 4: Flash IVY5661
Step 5: Reboot Your IVY5661
Step 1: Prepare Necessary Software
dloader is a necessary tool from Unisoc for flashing IVY5661 on Linux host machine. You can either download the prebuild deb package here, or build it from source.
How to build:
$ git clone https://github.com/unisoc/dloader.git
$ ./configure
*Note: Building dloader may use automake-1.14 which is in Debian Jessie or Ubuntu Trusty. Please check use the command automake --version to check the version.
$ make && sudo make install
Step 2: Set IVY5661 to ROM Code Mode
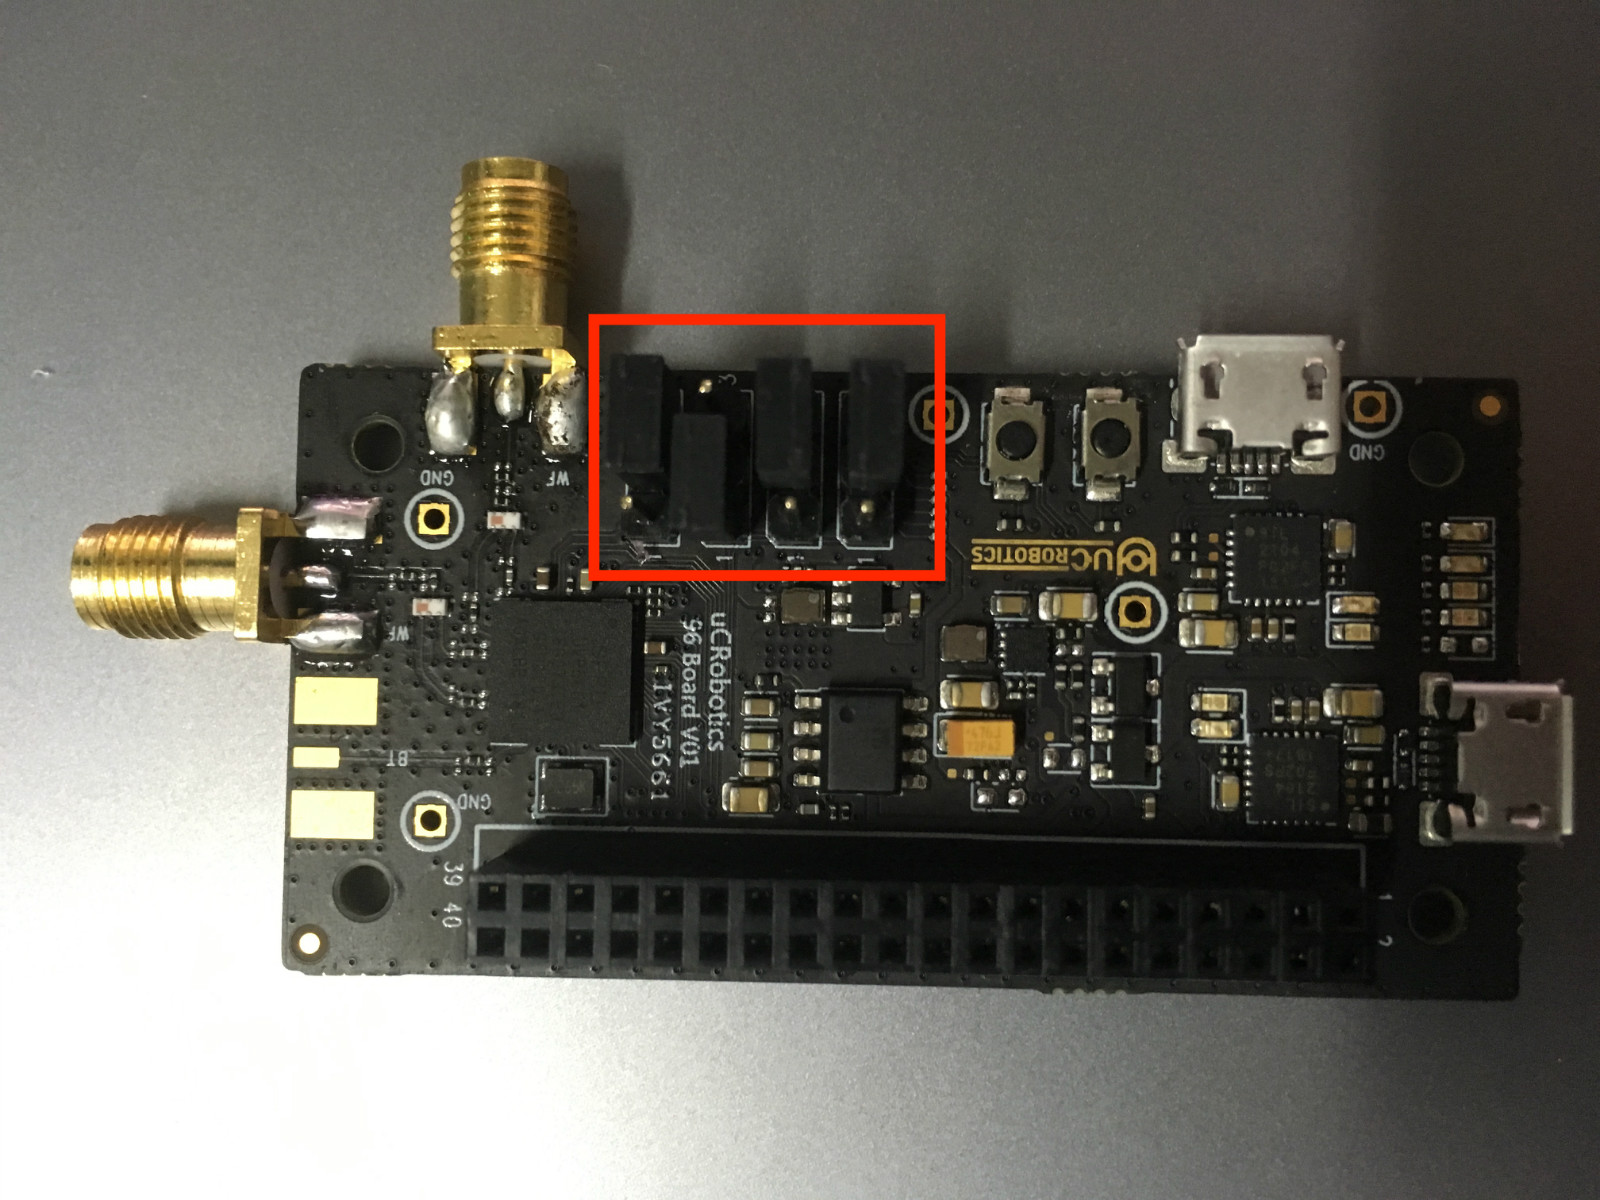
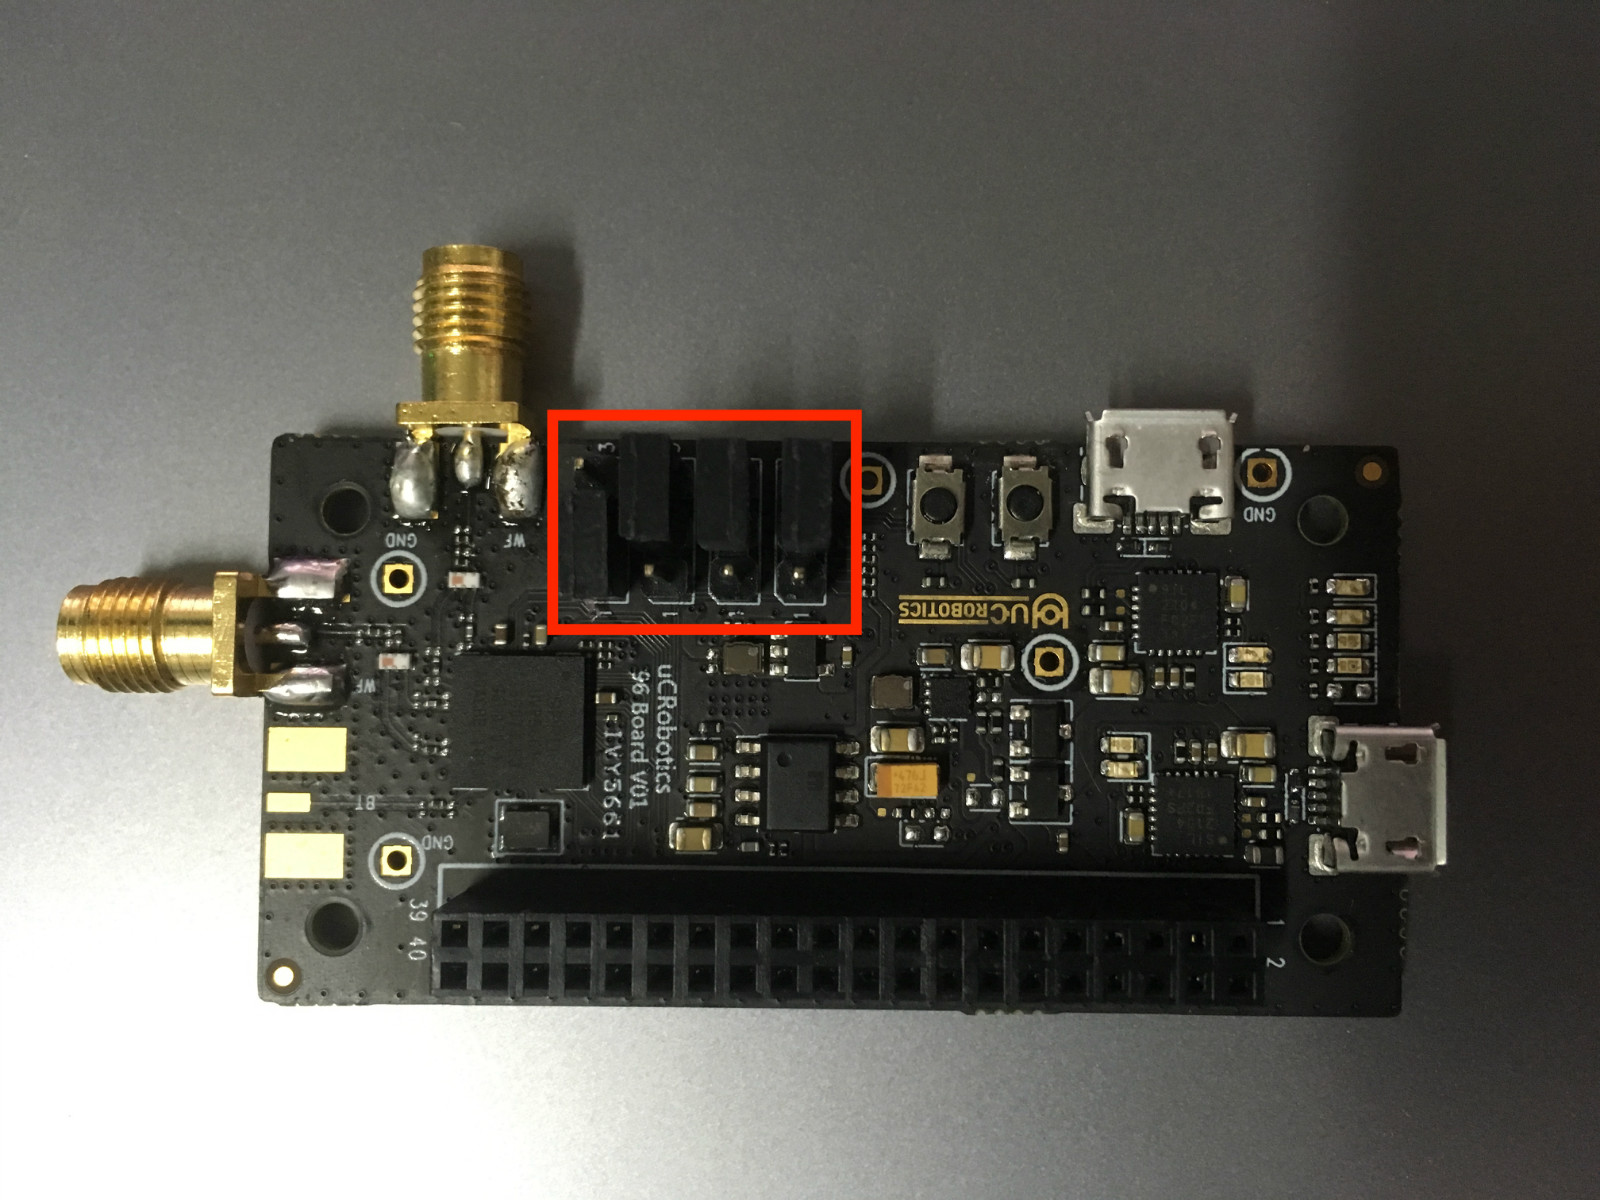
Switch bootstrap pin to ROM Code Mode, which is 3-2, 1-2, 3-2, 3-2
-
Step 3: Connect IVY5661 with Host Machine
Connect UART0 on IVY5661 to your host machine(Linux) with the USB to MicroUSB cable. If they are connected correctly, you will find the new device.
Step 4: Flash IVY5661
Enter the where binary files locate.
For example, if you follow the Build IVY5661 frome source, the workspace will be ~/workspace/unisoc_zephyr_sdk/output/repeater/images.
Running command ./update_fw.sh, the board will flashed automatically.
Sections and procegree bar will be showed while flashing.
Step 5: Reboot Your IVY5661
Before reboot your IVY5661, you need to swich the bootstrap pin to NOR FLASH mode, which is 3-2, 1-2, 3-2, 3-2
Then you can push the reset button and the board will be reset and reboot.