
Introduction
We have so far deployed Autoware.AI and Autoware.Auto on a Hikey970. It is now time to bridge both software stacks together so we can use the improved software of .Auto but still run functionalities of .AI that have not been ported yet.
In this post we will outline how to use the Velodyne driver from .Auto along with the NDT mapping algorithm from .AI.
It is worth noting that the mapping task is computationally expensive and as such we will not be able to generate a full map out of the .Auto pcap demo data. Nevertheless, the aim of this post is to set up the basis and show how both software stacks are integrated together which will open the development possibilities for Autoware users.
The post is organized as follows:
- Requirements
- Getting the ros1_bridge docker image
- Integrating .AI and .Auto
- Visualizing the generated pointcloud map
Requirements
To be able to follow the steps you should have followed the previous posts in the series and have .AI and .Auto available in your Hikey970.
The ros1_bridge can be installed from binaries or compiled from source if you need custom messages. Since we will use the default ROS messages, it is possible to install the bridge from the available binaries. Nevertheless, for the purposes of this post we will use 3 different pre-built docker images for .AI and .Auto, as we used in the previous posts and also one for the ros1_bridge.
For visualization purposes you also need a laptop with ROS2 installed natively or through a docker image.
Before starting following the steps please wget a modified param.yaml file for the velodyne node so that the pointcloud topic name and frame match those expected by the ndt_mapping that we will need later.
$ cd shared_dir
$ wget http://people.linaro.org/~servando.german.serrano/autoware/vlp16_test.param_ai.yaml
Getting the ros1_bridge docker image
We have prepared a docker image with a default root linaro user for the ros1_bridge which is available at the 96boards/ros Dockerhub repo. To get the image please ssh into the Hikey970 and do:
$ docker pull 96boards/ros:ros1_bridge
Integrating .AI and .Auto
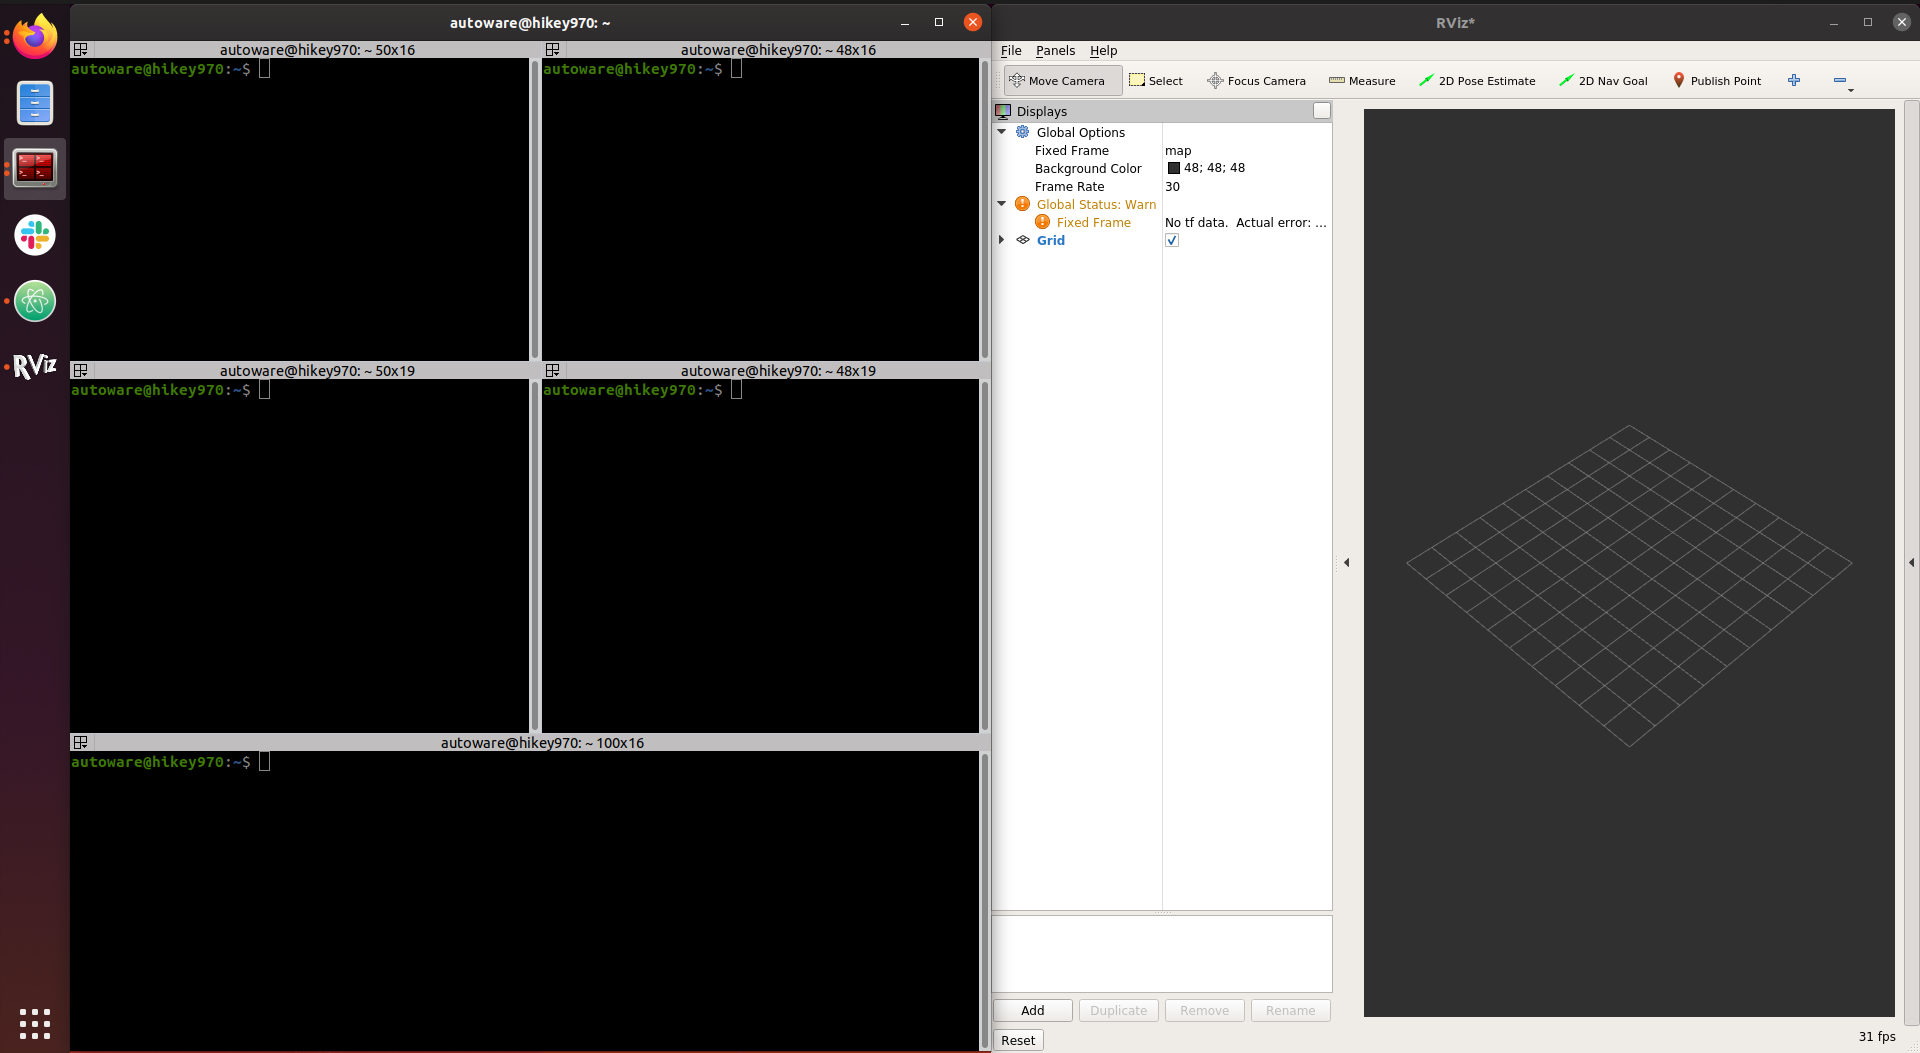
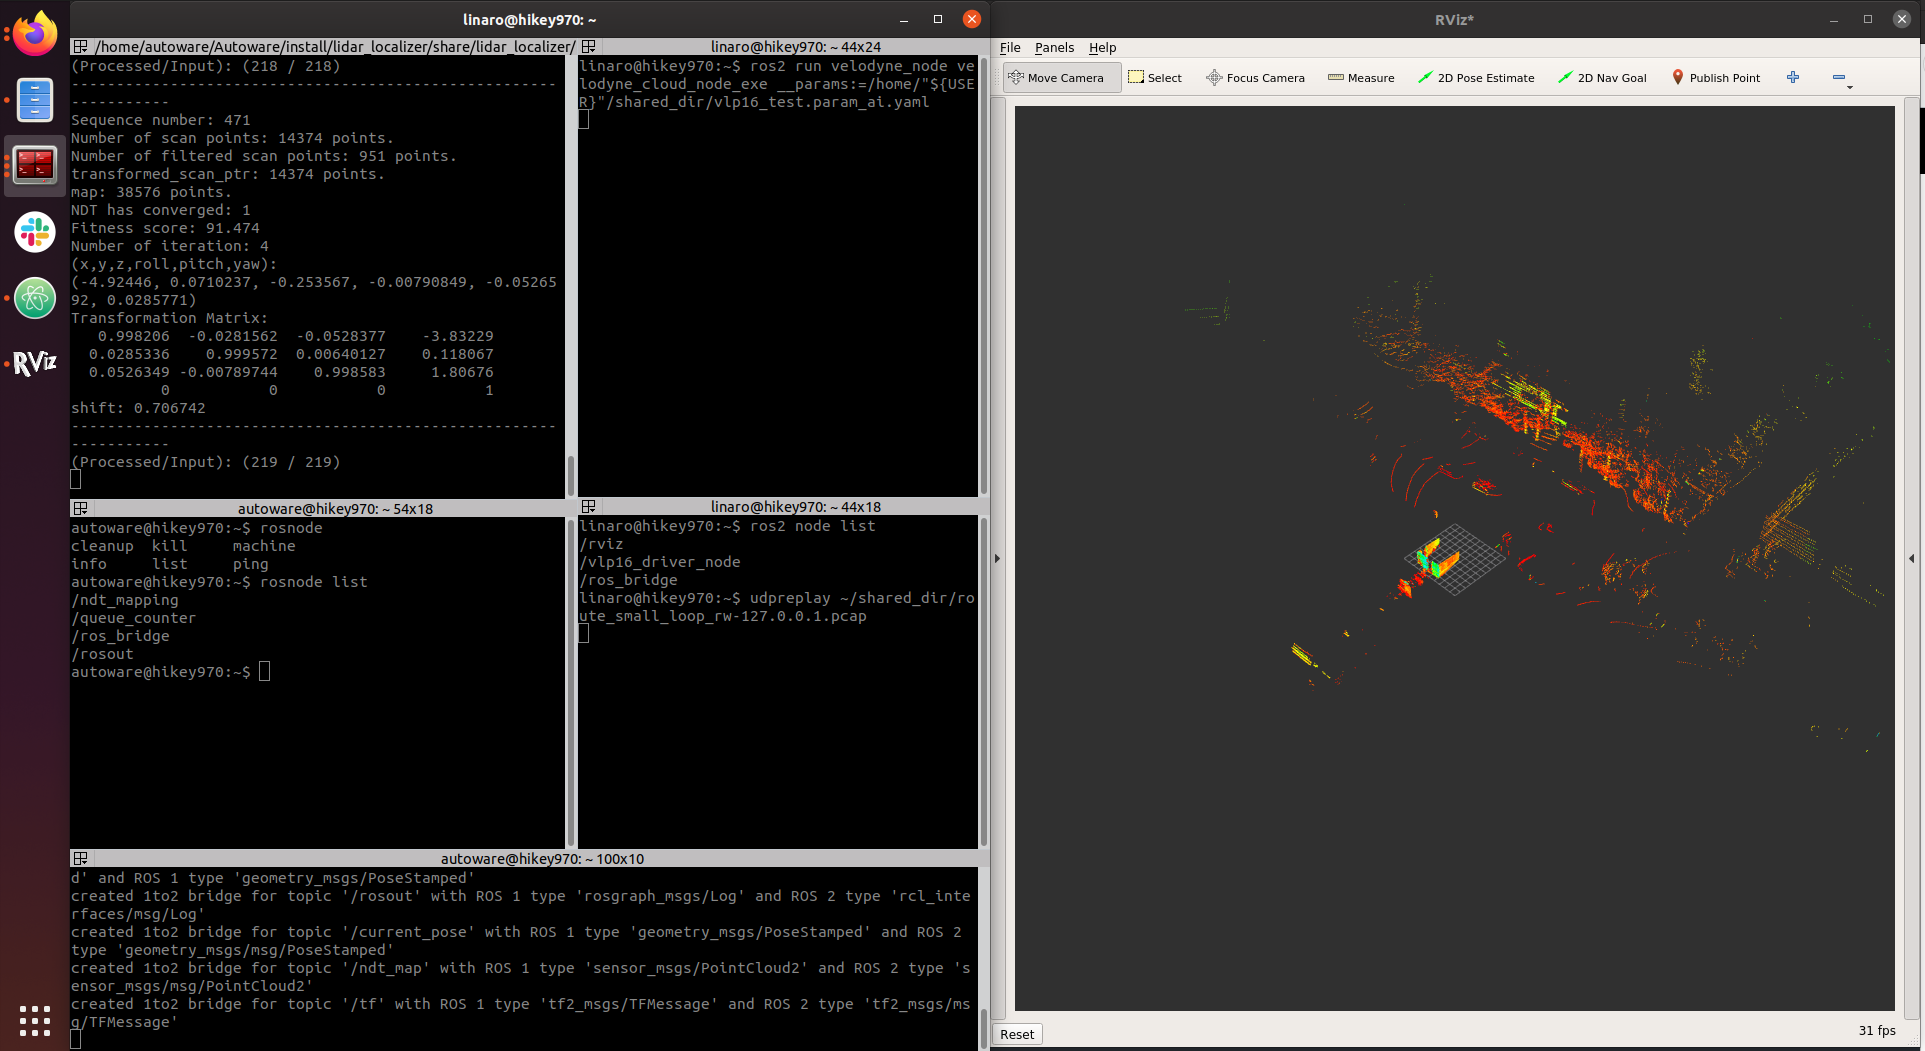
To complete the following steps we will need 5 terminals where we have ssh’ed into the Hikey970. In addition, if we want to visualize live the map that is being generated we need 1 terminal in our laptop where we run rviz2. So our screen will look similar to the image below.
We will use terminals 1 and 2 for the .AI container, 3 and 4 for the .Auto container and terminal 5 for the ros1_bridge container (which we will not start for now). So, for the .AI terminals we do:
- Terminal 1
$ cd docker/generic $ ./run.sh -c off -i autoware/arm64v8 -t 1.13.0 $ mkdir ~/.autoware $ cp -r ~/shared_dir/data ~/.autoware/data - Terminal 2
$ docker exec -it -u autoware CONTAINER_NAME /bin/bash
$ cd ~
$ source Autoware/install/setup.bash
And for the .Auto terminals:
- Terminal 3
$ docker run -it --rm --privileged --net=host -u linaro -v ~/shared_dir:/home/linaro/shared_dir:rw 96boards/autoware:auto /bin/bash $ source AutowareAuto/install/setup.bash - Terminal 4
$ docker exec -it -u linaro CONTAINER_NAME /bin/bash
$ source AutowareAuto/install/setup.bash
If we hide the rviz GUI and expand the terminals or screen will look as shown below, where we have used 4 terminals and the bottom one is reserved for the bridge container. 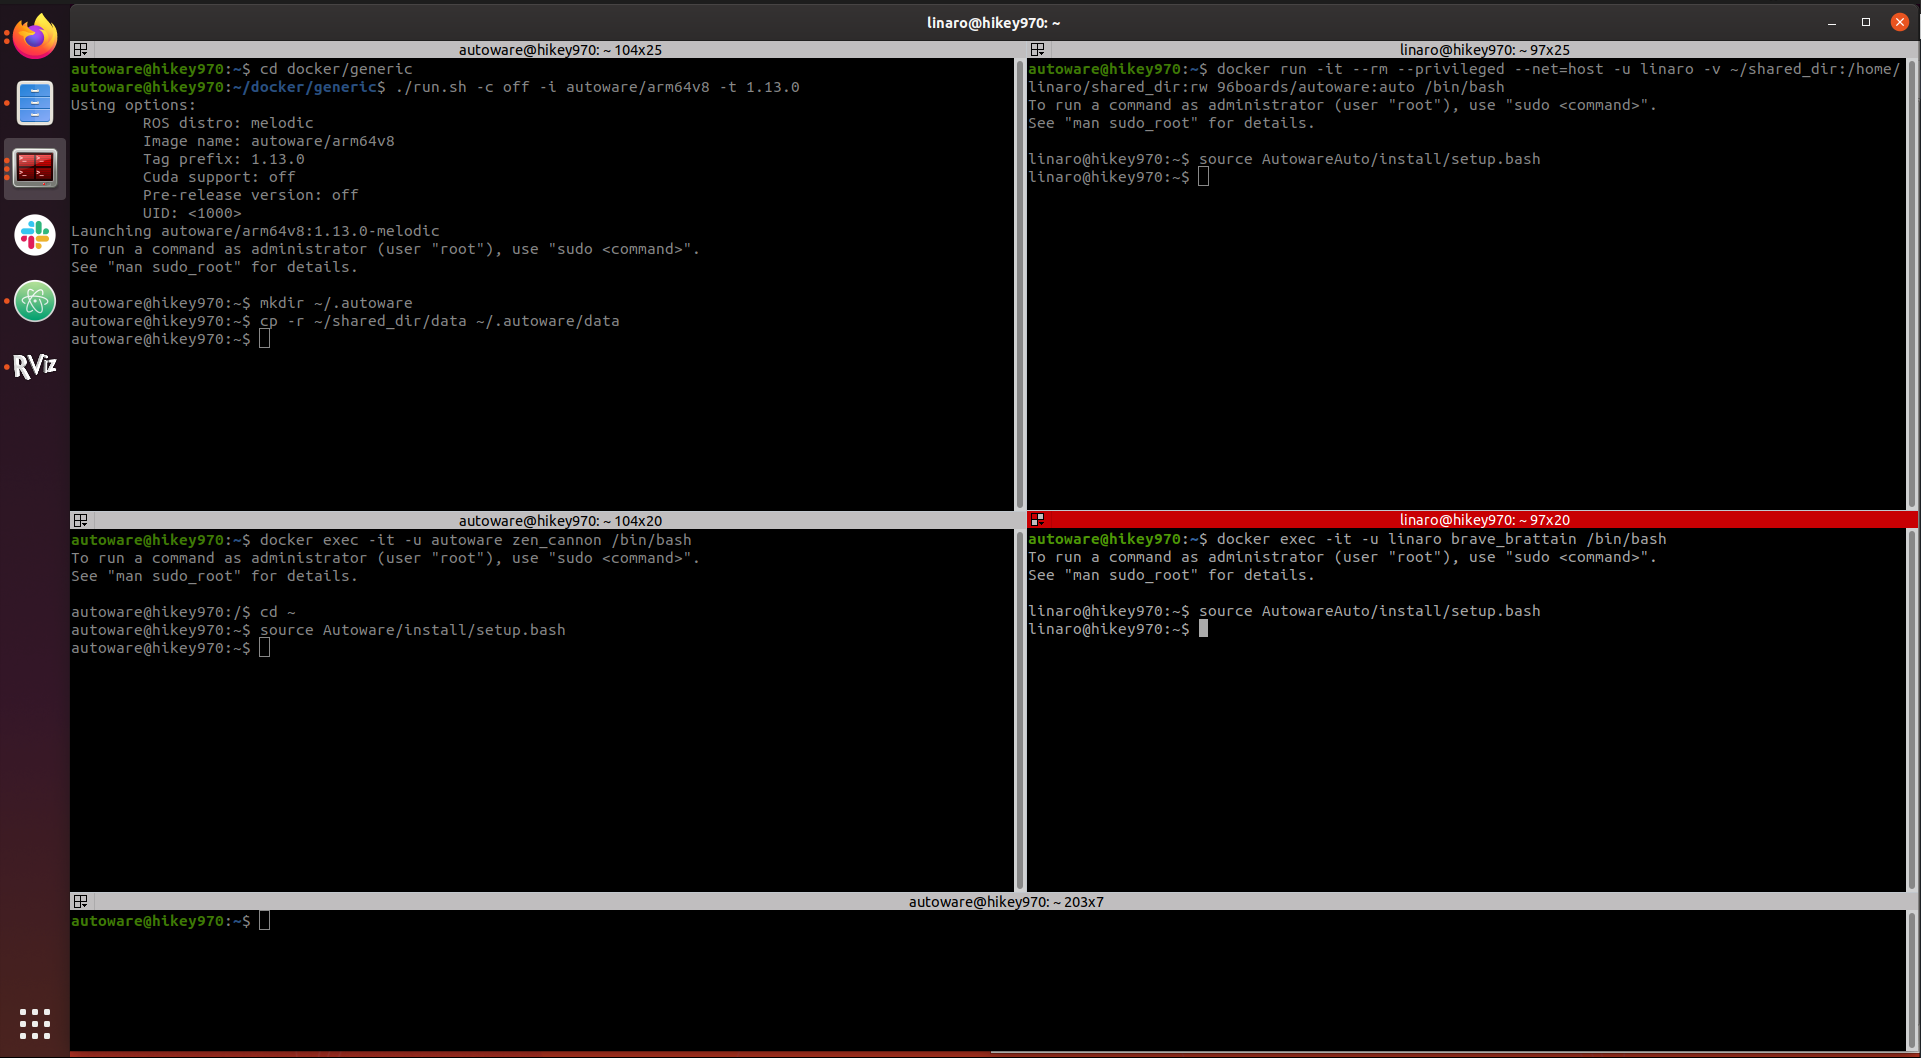
We are now ready to launch the ndt_mapping from .AI, to do so we need to preload some parameters first.
In terminal 1:
$ roscore &
$ rosparam load ~/shared_dir/headless_setup.yaml &
$ roslaunch lidar_localizer ndt_mapping.launch
Terminal 2 is reserved for saving the pointcloud map after processing so we don’t need it at the moment.
Regarding .Auto we need to run steps 4 and 5 of the 3D Perception demo as we outlined here, but we will use the modified param.yaml that we downloaded earlier.
In terminal 3 we start .Auto velodyne node:
$ ros2 run velodyne_node velodyne_cloud_node_exe __params:=/home/"${USER}"/shared_dir/vlp16_test.param_ai.yaml
At this point we have .AI and .Auto components running alongside in the board but not yet talking to each other. We can enable the communication between both stacks by running the ros1_bridge conatiner in terminal 5 as:
$ docker run -it --rm --privileged --net=host -u linaro 96boards/ros:ros1_bridge /bin/bash -c "source /opt/ros/melodic/setup.bash && source /opt/ros/dashing/local_setup.bash && ros2 run ros1_bridge dynamic_bridge --bridge-all-topics"
This container will automatically source both ROS distributions and bridge all ROS1 and ROS2 topics that are using default messages so that they are visible across ROS distros. In particular for this demo we are interested in:
/points_raw: of type PointCloud2 which is generated in thevlp16_driver_nodenode from .Auto which is fed into thendt_mappingnode from .AI./ndt_map: of type PointCloud2 which is generated in thendt_mappingnode from .AI and that we can visualize inrviz2in our laptop.
For live visualization of the pointcloud map we add the topic in rviz2 as shown in the next image, where we have also increased the default Size of pointcloud markers to 0.1. 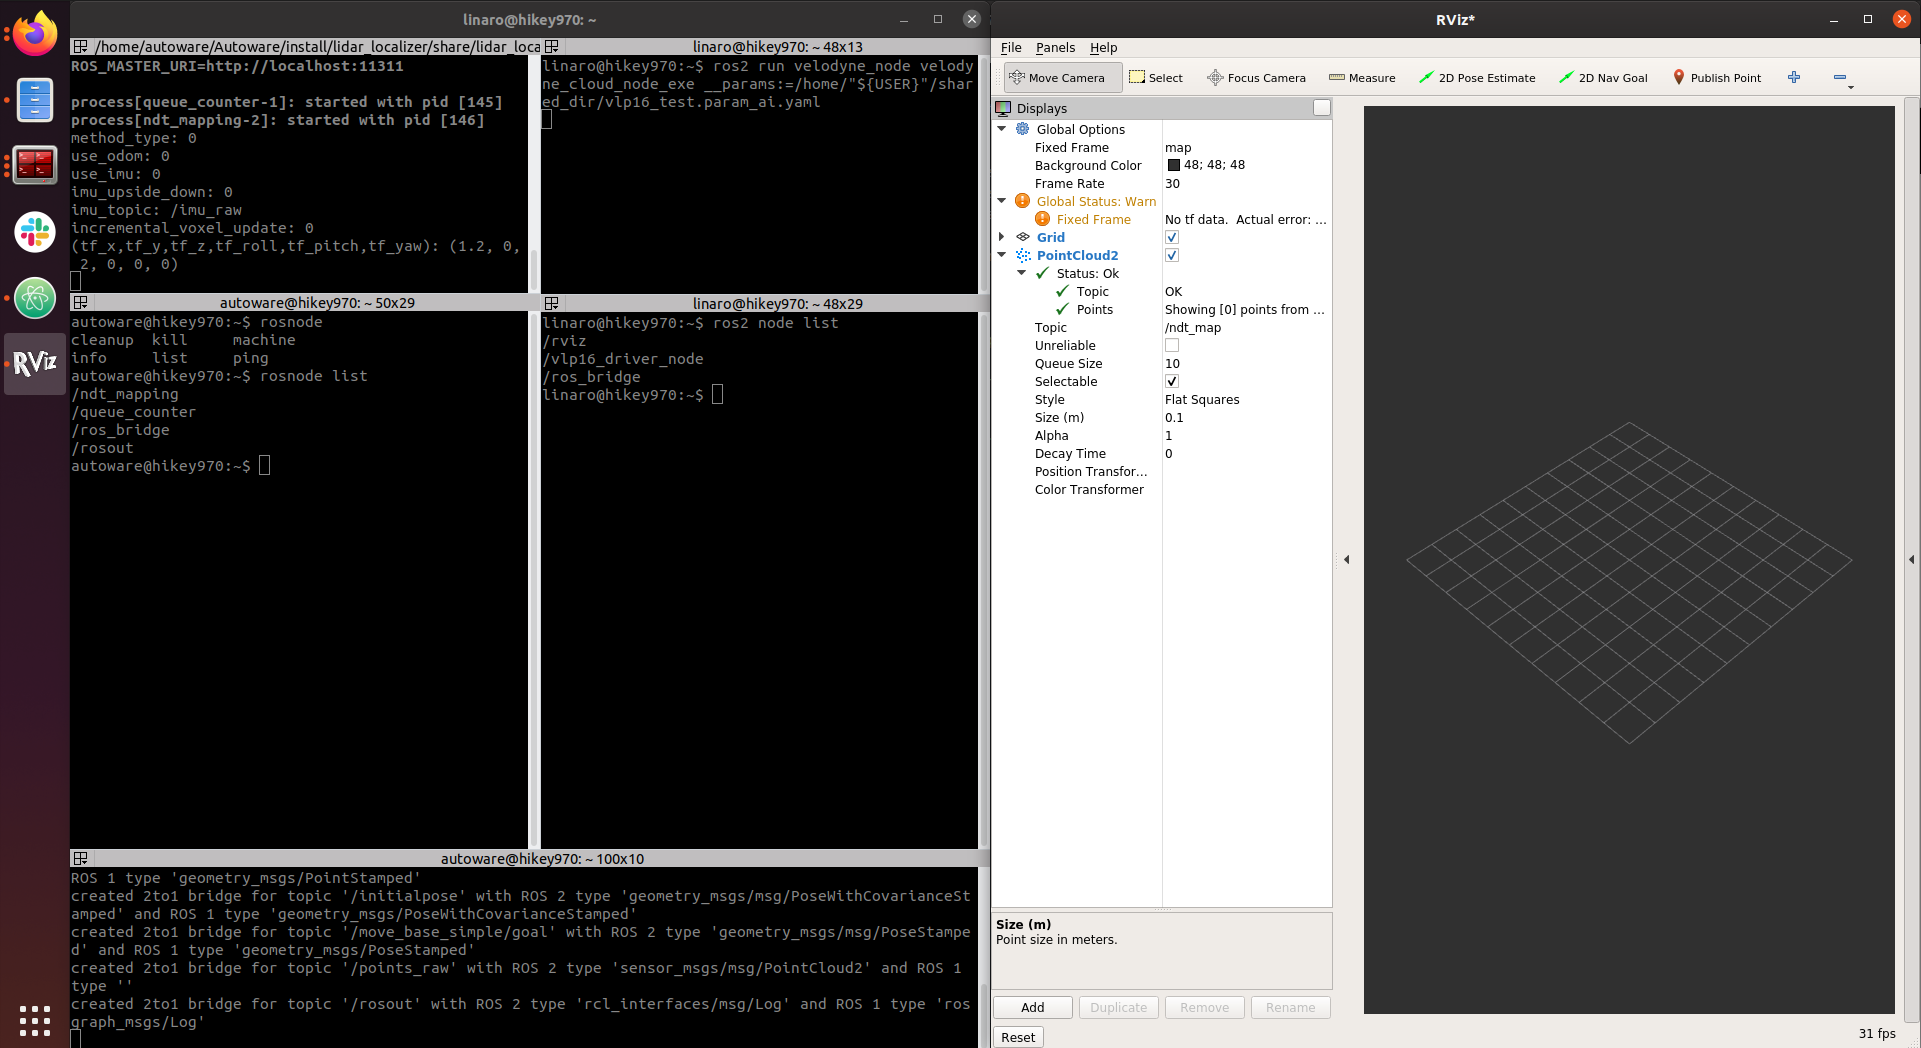
We are ready to start replaying .Auto pcap demo data in terminal 4 as:
$ udpreplay ~/shared_dir/route_small_loop_rw-127.0.0.1.pcap
We will be able to see how the map is built in rviz2 as we can see in the following screenshots: 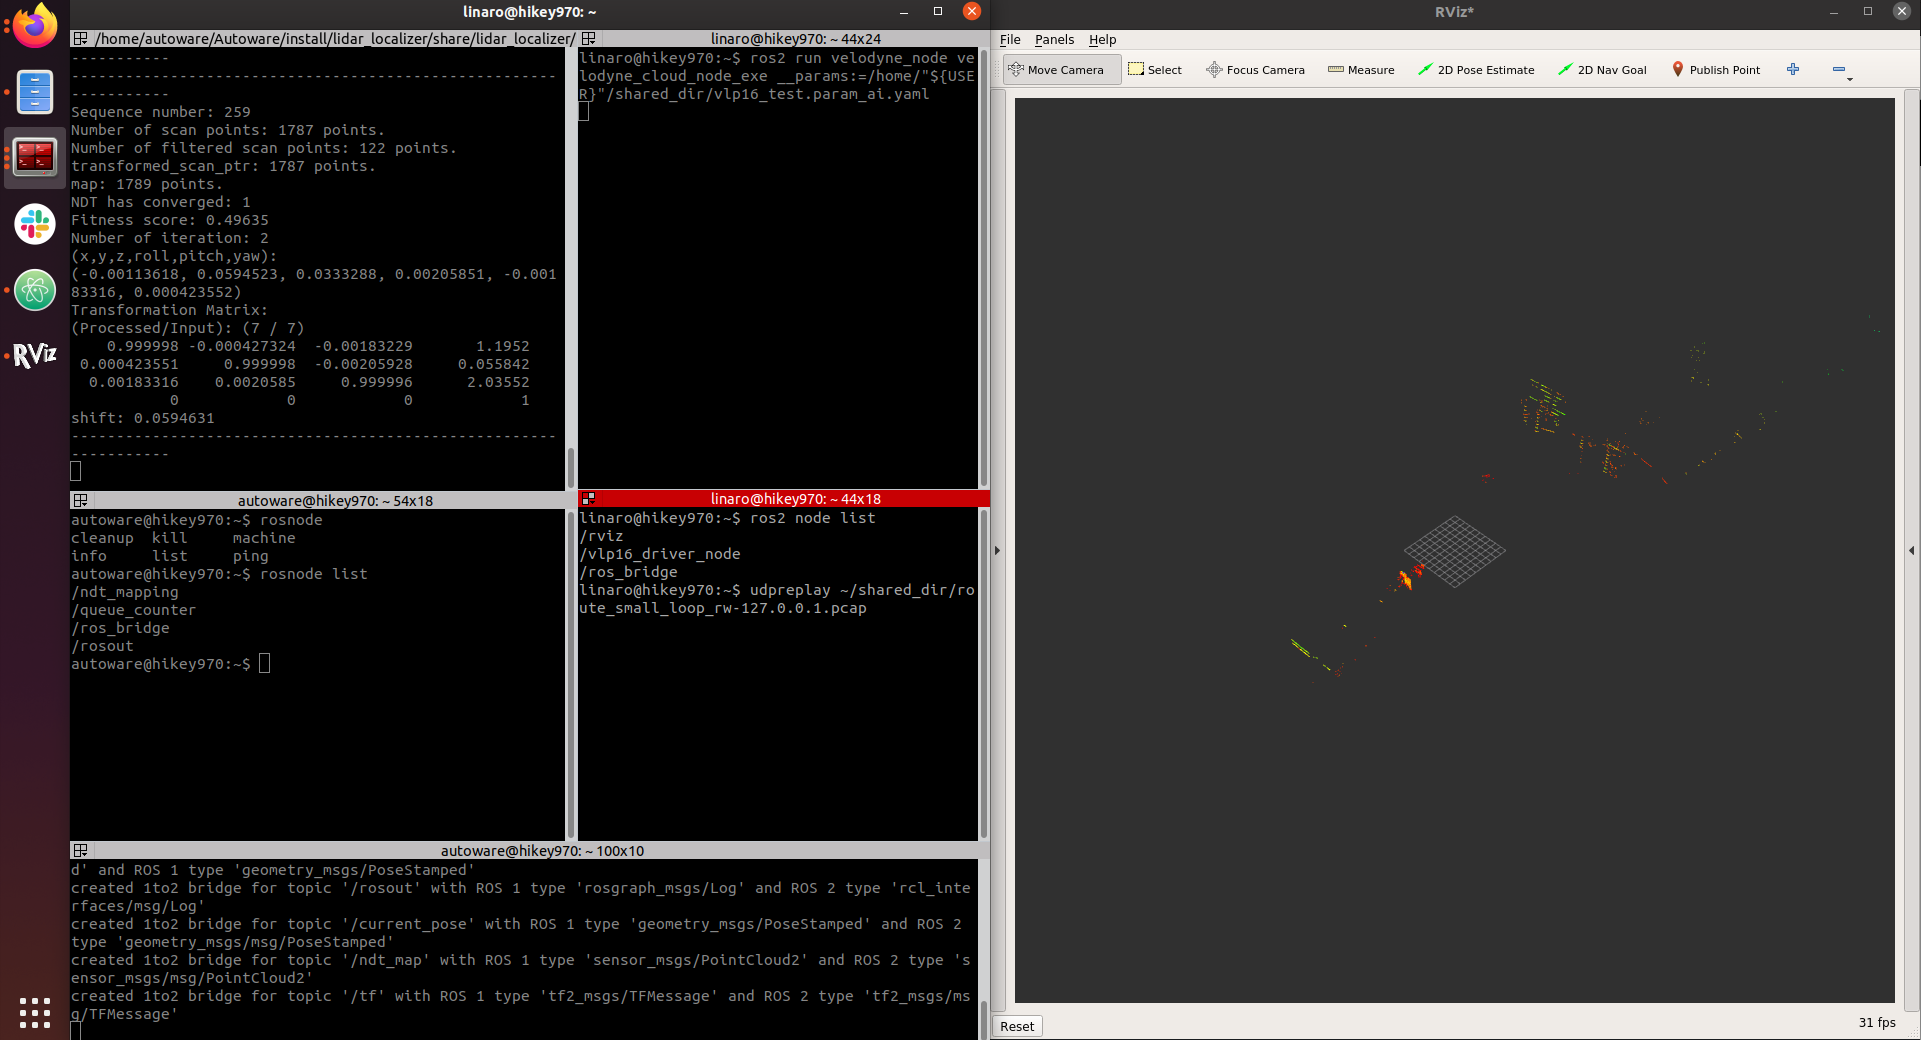
As we mentioned at the start of the post the computational needs for the mapping task are quite heavy and so the processing will take longer as the number of points in the map grows. We can stop the pcap replaying by doing Ctrl+C in terminal 4. To save the map, in terminal 2 we do:
$ rostopic pub /config/ndt_mapping_output autoware_config_msgs/ConfigNDTMappingOutput "header:
  seq: 0
  stamp:
    secs: 0
    nsecs: 0
  frame_id: 'map'
filename: 'auto_map.pcd'
filter_res: 0.2"
As we show below: 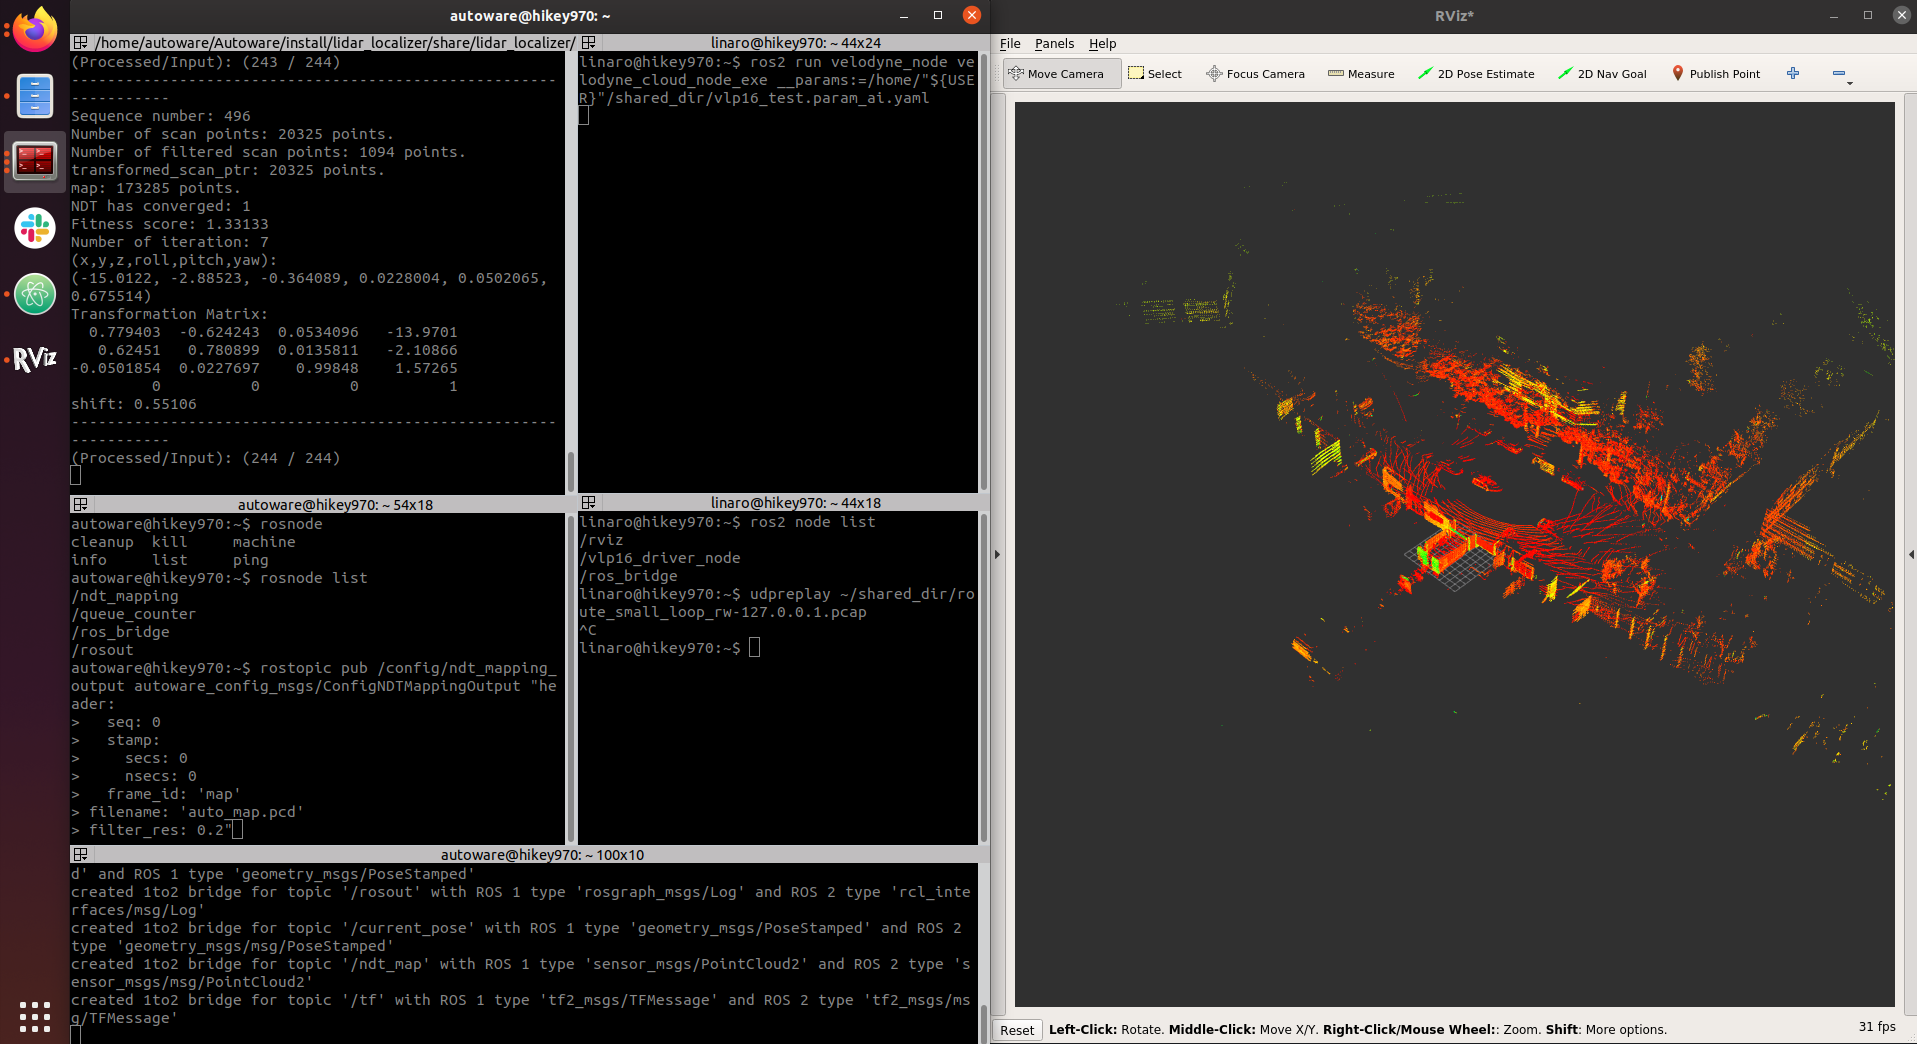
Once the mapping process is complete the pcd map will be generated in the .ros folder. We need to move it to shared_dir if we want to keep it after we stop the container.
$ mv ~/.ros/auto_map.pcd ~/shared_dir/
Visualizing the generated pointcloud map
To visualize the pointcloud map we need to:
scpthepcdfrom the Hikey970 to the laptop and store it inshared_dir.- Start an Autoware.AI container as we did here.
$ cd ~/docker/generic
$ ./run.sh -c off -t 1.13.0
$ cd shared_dir
$ roscore &
$ rosrun map_file points_map_loader noupdate `pwd`/auto_map.pcd &
$ rviz
Within
rvizwe can select the/points_maptopic and, as we did previously, increase theSizeto 0.1. The result is displayed below.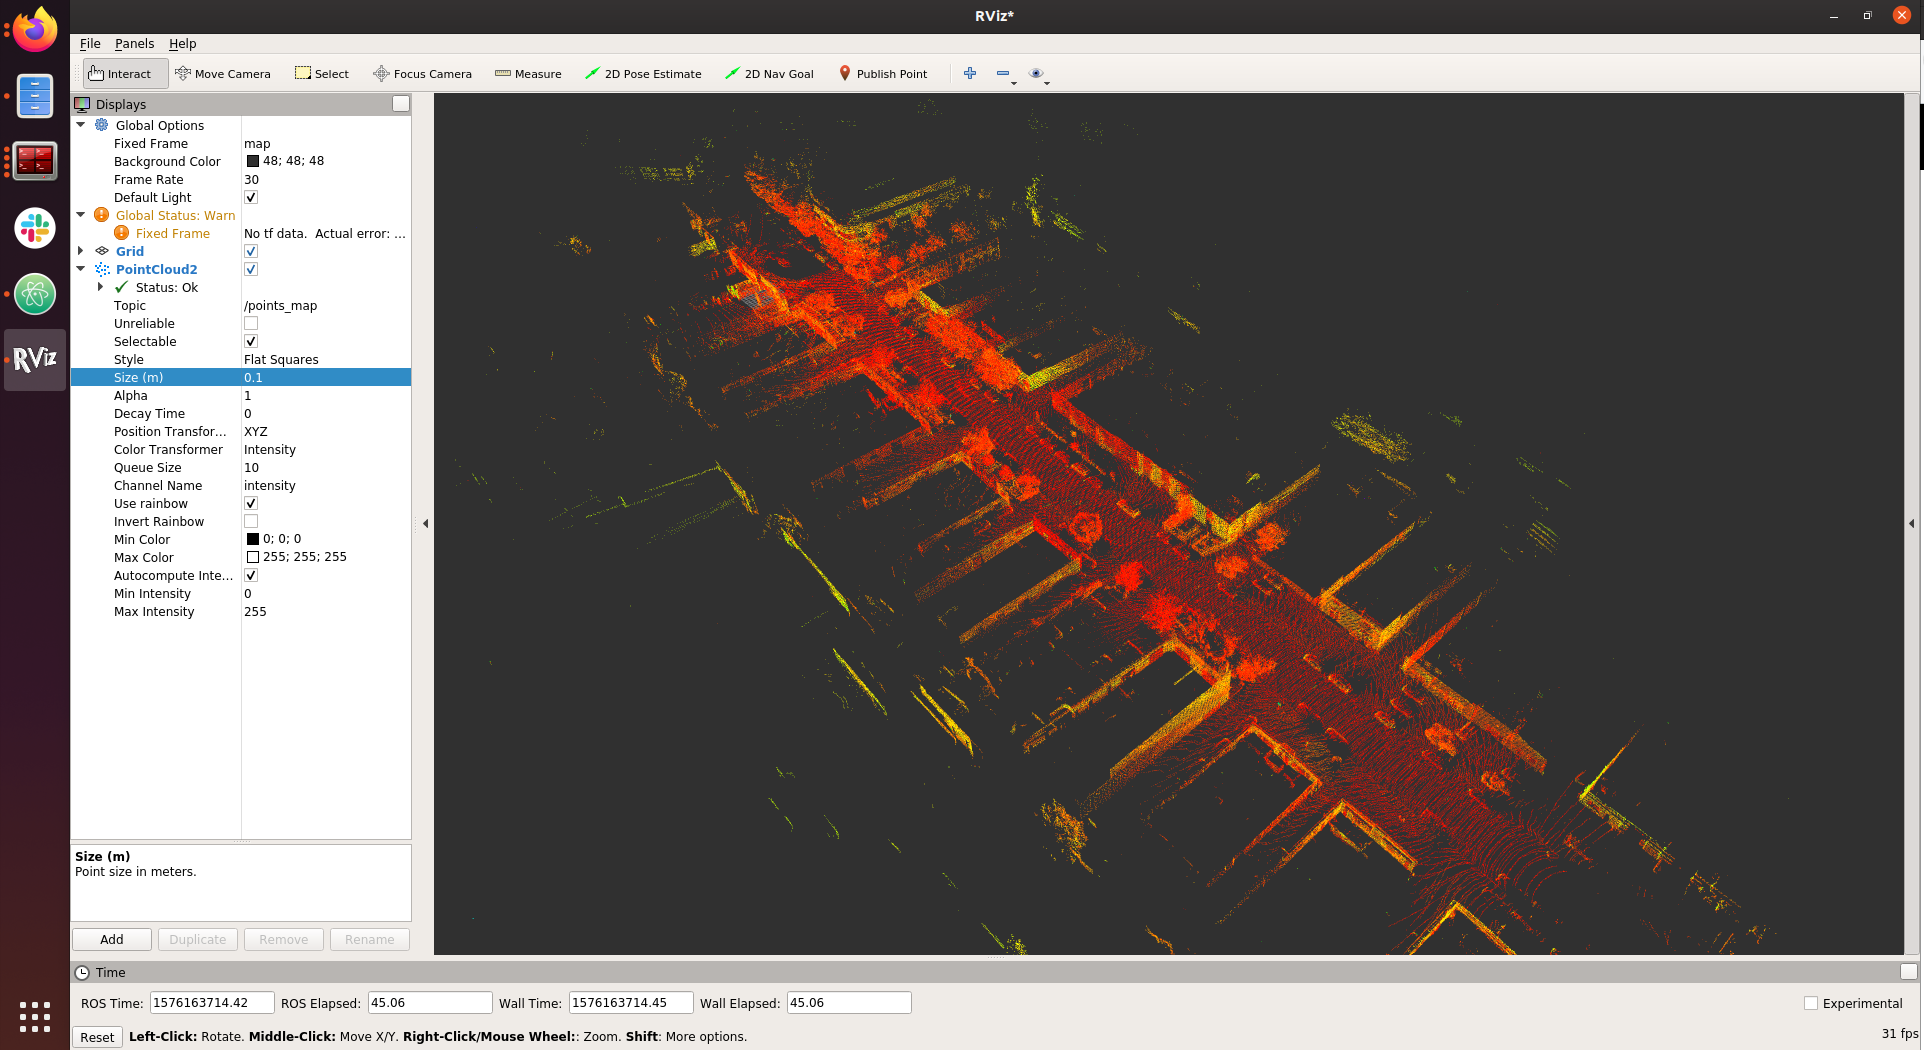
Conclusion
This is the third post of our Autoware everywhere series. So far we have shown how we can use Autoware.AI, .Auto and both together in the Hikey970. Next we will look at reproducing the same work on the Dragonboard845-c which we already prepared to use with Docker as part of our Real time and ROS2 series, so keep an eye to this space.
This article is Part 3 in a 15-Part Series.
- Part 1 - 96boards: Autoware everywhere | Autoware.AI and Hikey970
- Part 2 - 96boards: Autoware everywhere | Autoware.Auto and Hikey970
- Part 3 - 96boards: Autoware everywhere | Bridging .AI and .Auto in the Hikey970
- Part 4 - 96boards: Autoware everywhere | Autoware.AI and Dragonboard-845c
- Part 5 - 96boards: Autoware everywhere | Autoware.Auto, bridge with .AI and Dragonboard-845c
- Part 6 - 96boards: Autoware everywhere | Binding Autoware.AI nodes to CPUs
- Part 7 - 96boards: Autoware everywhere | Defaulting to Cyclone DDS
- Part 8 - 96boards: Autoware everywhere | First look at AutoCore's PCU
- Part 9 - 96boards: Autoware everywhere | meta-arm-autonomy in AutoCore's PCU
- Part 10 - 96boards: Autoware everywhere | Running Cyclone DDS on Kubernetes
- Part 11 - 96boards: Autoware everywhere | Xenomai on PCU
- Part 12 - 96boards: Autoware everywhere | K8s-based Autoware deployment on PCU
- Part 13 - 96boards: Autoware everywhere | Autoware.Auto 3D Perception Stack using k8s on PCU
- Part 14 - 96boards: Autoware everywhere | Multi-board Autoware.Auto 3D Perception Stack using k8s
- Part 15 - 96boards: Autoware everywhere | Updating Autoware.Auto 3D Perception Stack modules


